Tuesday, March 27, 2018
Sunday, February 4, 2018
Install Raspbery pi On PC
Linux Raspberian- Go to http://qemu.weilnetz.de/w32/
- Select the 32-bit folder.
- Click on the version with the most recent modify date.
- When it downloads, use 7zip to extract it’s contents into a folder.
Download Raspberry Kernel for Qemu
- Go to https://github.com/dhruvvyas90/qemu-rpi-kernel
- Select the most recent file.
- Click on the “Download” at the left of “History”
- After it downloads, place the file inside the folder where you extracted the QEMU.
Download Raspbian Image
- Go to http://downloads.raspberrypi.org/
- Click on “Downloads” Select “Raspbian”
- Download the Pixel desktop version.
- After it downloads, extract the contents on the same folder where you extracted QEMU.
Config the Emulator
- Get inside the folder where you extracted Raspbian, QEMU and placed the Kernel.
- Create a new text file and name it “start.bat”
- Right click on it and press “Edit”
- Type in qemu-system-arm -kernel kernel-qemu-4.4.34-jessie -cpu arm1176 -m 256 -M versatilepb -no-reboot -serial stdio -append “root=/dev/sda2 panic=1 rootfstype=ext4 rw init=/bin/bash” -drive “file=2017-03-02-raspbian-jessie.img,index=0,media=disk,format=raw” -redir tcp:2222::22
- Save the file and close it.
- Type “cmd” on the address bar to start up the command prompt.
- In the command prompt, type “start.bat”
- wait until raspberian ready, after done, type in;
- sudo nano /etc/udev/rules.d/90-qemu.rulesKERNEL==”sda”, SYMLINK+=”mmcblk0″
KERNEL==”sda?”, SYMLINK+=”mmcblk0p%n”
KERNEL==”sda2″, SYMLINK+=”root” - Press “Ctrl X” “Y” “Enter”
- Close the emulator.
- Go to the “start.bat” file.
- Delete the line “init=/bin/bash””
- Save and close the file.
- In the cmd, type in “qemu-img.exe resize 2017-03-02-raspbian-jessie.img +4G”
- Press “Enter”
- A small error will appear, but the resizing will take effect.
- Type in “start.bat”
- Press “Enter”
Thursday, February 1, 2018
Base DietPi Config
DietPI Linux
Pada artikel ini, saya akan memberikan tutorial bagaimana cara mengkonfigurasi password dan nama host pada sistem operasi dietPi.
ok, langsung saja kepada cara konfigurasinya.
pertama, silahkan anda login menggunakan username default dari sistem operasi dietPi, anda dapat menggunakan nama pengguna dan kata sandi seperti dibawah ini;
username : root
password : dietpi
jika login berhasil, maka akan tampil halaman konfigurasi, namun jika gagal maka anda harus mengulangi langkah login kembali.
catatan: jika dietpi baru dipasang, maka anda harus menunggu update terlebih dahulu, kemudian dilanjutkan pada langkah pertama
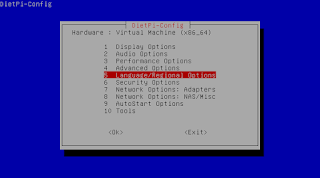
Pilih dietPI-config untuk melanjutkan konfigurasi
Kemudian pilih Security Option
Selanjutnya pilih change root password
silahkan ganti password login DietPi anda.
selanjutnya pilih pada change hostname
silahkan ganti hostname DietPi anda, untuk langkah ini, perangkat anda akan di restart
Wednesday, January 31, 2018
How to Install Debian 9
Linux
Download Debian 9 ISO from here, put the OS burned DVD into the DVD-ROM drive or make USB Boot disk, change the boot sequence of your system so that it boots from Installation Media.
After booting from instalation media, choose “Graphic Install” for starting Debian Installation in graphical mode.

Select a language you like to use during the installation of Debian.

Select your location.

Configure your keyboard.

Configure the network:
Set the hostname for your system. Here, enter a host name without a domain name.

Enter your domain name. If this server is on your home network, then leave it blank.

Set root password:
Enter a password for the root account. To have a greater security over an account, make sure a password contains a mixture of letters, numbers and special characters.

Create a new user:
Create a new, non-root user for non-administrative activities. Enter a name.

Enter a user name for the above user. This name is the actual username you use to login into the system.

Set a password for the user “raj“.

Select the Timezone.

Partitions Creation:
Next, choose any one of the partition methods to create partitions during the installation process.
Automatic:
- Guided – use entire disk: Uses full disk and creates simple partitions (without LVM) for OS installation
- Guided – use entire disk and set up LVM: Uses full disk and creates partitions on top of LVM.
- Guided – use entire disk and set up encrypted LVM: Uses full disk and creates partitions on top encrypted LVM.
Manual:
- Manual: Use this to create partitions of your choice. This partitioning method is for advanced users. You can also use this method to retain your previous operating systems as well as your data if you partition correctly.
For this tutorial, I am choosing a second option (Guided – use entire disk and set up LVM).

Next, select the disk you want to partition for Debian installation.

I am choosing to have a separate partition for /home, /var, and /tmp partitions.

Choose “Yes” to write changes to disk and configure LVM.

Once the changes are written to the disk, then the final disk layout will look like below.

If you are happy with the partition layout, choose “Yes” to write changes to disk.

Once the partition creation is done, the installer will begin the installation of the base system.

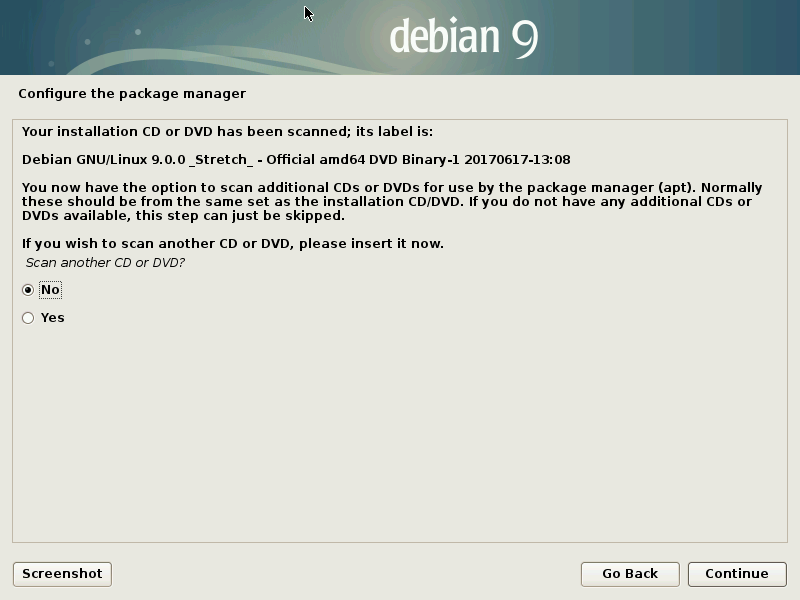
Configure the package manager:
Choose “No” to skip the scanning of another CD or DVD.

Choose “No” to use a network mirror.

Choose “No” to Participate in the package usage survey.

Choose the software you want to install at the time of Debian installation. Make sure you have selected “SSH server” for remote terminal access.
If you want to install Debian Minimal server – Untick the Debian desktop environment on the following step

Debian installer is now installing software for you.

Choose “Yes” to install the GRUB boot loader to the master boot record.

Select the partition or disk on which you want to install the GRUB boot loader.

The installation is now complete, click “Continue” to reboot your system.

The login screen of Debian 9:

Debian 9 Gnome Desktop:

How to Install DietPI?
DietPI Linux Raspberry
DietPi is a mini operating system for raspbery pi and PC, dietPI base on debian for arm procesor, it's will be best perform for used.
You must be have a DietPi requery to install it;
- 2GB Storage greater
- Internet Access.
Download DietPi Image):
You can Download dietpi from DietPi.com, select the dietpi version card using Etcher:
- Unzip/extract the DietPi.7z image (ideally your desktop)
- Download and install Etcher
- Run Etcher
- Select the DietPi_v00.img image file
- Select the drive of your SD card
- Click Flash!
Source : dietpi.com
Tuesday, January 30, 2018
Knowing About Raspberry Pi 3 Model B.!!!
Raspberry Raspi
Raspberry Pi 3 Model B is a board of the previous version of the Raspberry Pi board. Raspberry Pi model B 3 comes with a new processor is much faster than its predecessor. In addition this product is also equipped with WiFi and Bluetooth Low Energy which serves as a medium of exchange data wirelessly.
The Specifications of raspberry pi 3 model B:
- Processor: Broadcom BCM2837 Quad Core 1.2 GHz 64-Bit
- Architecture: ARM
- Sub-Architecture: ARMv8
- RAM: 1 GB
- Wireless Network: Wifi and Bluetooth Low Energy
- Ethernet Network: 10/100 Mbps
- GPIO: 40 pin
- USB: 4x USB 2.0 ports
- 4 Pole stereo output and composite video ports
- HDMI ports (full size)
- Port CSI camera to connect to the Raspberry Pi camera
- Port DSI display to be connected to a touch screen Raspberry Pi
- Micro SD slot for loading operating system and store data
Raspberry pi 3 Operating System;
-Linux : raspberian, dietpi, etc
-Windows iOT
Source : raspberrypi.org
Subscribe to:
Comments (Atom)
How to Install DietPI?
DietPi is a mini operating system for raspbery pi and PC, dietPI base on debian for arm procesor, it's will be best perform for used. ...

-
Pada artikel ini, saya akan memberikan tutorial bagaimana cara mengkonfigurasi password dan nama host pada sistem operasi dietPi. ok,...
-
1. Write raspberian image to MicroSD 2. Create file without extention as "SSH" 3. Plugin your microSD to raspberry and turn ...
-
DietPi is a mini operating system for raspbery pi and PC, dietPI base on debian for arm procesor, it's will be best perform for used. ...
-
in this article, we will share how to run raspbeian os or raspberry pi os on windows using qemu virtual machine. PREPARE QEMU ...
-
Download Debian 9 ISO from here , put the OS burned DVD into the DVD-ROM drive or make USB Boot disk, change the boot sequence of your sys...
-
Raspberry Pi 3 Model B is a board of the previous version of the Raspberry Pi board. Raspberry Pi model B 3 comes with a new processor is m...


